When it comes to the expense of framing, shipping, the gallery’s percentage cut, the risk of needing to have things shipped back afterward, and all those instances where art gets stolen or damaged somewhere along the way, galleries close unannounced, or maybe never even existed – well, gallery showings are the sort of anxiety that I often find myself trying to avoid. For this reason I tend to prefer conventions if possible, or shows that are actually within driving distance.
And in those instances, I still often find myself in this sort of panicked state over things: Logistics, packing, unpacking, hanging, being around people all come in to play – but the highest anxiety of all, tends to come with framing.
Since I make most of my sales online, and since frames add significantly to the online selling price, and to the shipping cost – I tend to send my large originals unframed, unless otherwise requested – which means that I never bother framing them at all – until that rare chance to show someplace worthwhile and drivable presents itself… as things with galleries go, which often starts with a “showtime is two weeks from now and we need these in a few days”.
Being an artist, I never have money laying around to frame one piece, let alone three or five. If I ever find myself with a handful of bills to call my own, the money typically goes toward re-stocking on shipping tubes, getting a new run of merch made, having a run of prints printed, buying new canvas, new paints, something entirely new to try my hand at, or bigger and better versions of things I have, for making a bigger and better piece I’ve dreamed of being able to make.
If you are an artist who has ever needed something custom-framed for a coming show, and find that the framing stores have closed – or just cannot afford to have frames done at a gallery, or even craft store – a table saw (or a hand saw and a miter box) are often a god-send.
I typically make some pretty nice frames – though not as wonderfully ornate as those made from the sort of moulding that one can only get through a framing store, they are made from real wood – most often some really good real wood, and are incredibly durable and made to last. They also have a bit of hand-made charm to them, and often are a bit of artwork in their own.
Sometimes I add polymer clay, brass fittings, brass chains and ornaments, decorative tacks, wood appliques, or designs I have cut with a scroll saw; Sometimes I accent them through pyrography, or intricate carved details – they sky is pretty much the limit when making one’s own frames…
Well, the sky, time, and money…
This is one of those instances where money and time factored in more than most. This frame was not made from the chunk of fire maple I am saving for something, or the strip of cherry I am saving for something else – it was made from used pine, which came from supports for a stage set – though I almost used an antique door or two to have harder wood in this mix without using my reserved pieces.
Step 0: (Materials and Preparation):
Materials: Wood, wood glue
Tools: Saw, miter box (can be made with wood and saw), table saw (optional), clamps or straps or a bit of ingenuity to hold pieces tight until the glue dries, sand paper.
Recommended: Something to make the wood something more than just flat and boxy – such as a router, Wood burner, rotary tool, scroll saw, bits to decorate the frames with such as brass cabinet knobs, bits of chain.. the sky is the limit. Really, it depends on how intricate and perfect you want them – you can make them anything from folksy and bare, to contemporary and smooth/plain, to fine works of wood-crafting, to works of art in their own.
Preparation: I cut the pine pieces long-way with the table saw to make sure I had enough pieces, and that they were equally broad and equally thick. For the main part of the frame, I made two pieces that were 8 feet long, 3 inches wide, and 1 inch thick. From a 2×4 stud, I also made 2 pieces that were 8 feet long, 1 inch wide, and half an inch thick. You can skip that step if you can get to a hardware store and buy wood in this size – I recommend a few strips of select pine (heartwood pine) – It acts like hardwood, feels like hardwood, even *counts* as a hardwood to some – and is only about $3 a strip at Home Depot – buy 2 1x2s, 1x3s, or 1x4s, and one 1×1 – and you won’t need to do any length-wise cutting. If you do not have a table saw, a handsaw and a miter box will do. If you do not have a miter box – make one (3 pieces of wood, plus wood glue (or nails) and something the measure a 45 degree angle with). A good string wood glue in necessary. Ratcheting straps (tow straps) or corner clamps, or maybe even bar clamps if they are big enough for what you are working on – will save you a lot of frustration. Without pressure, the wood glue will take forever to dry, and your bonds will not be as strong or as clean. Paint, or wood stain, will probably also come in handy.
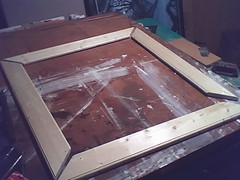
 First step was to make a basic frame with an inside dimensions of 49×30 and outside dimension of 55 x 36. This construct is just flat wood and 45 degree angles – nothing fancy – all done with a table saw and an angle jig. First step was to make a basic frame with an inside dimensions of 49×30 and outside dimension of 55 x 36. This construct is just flat wood and 45 degree angles – nothing fancy – all done with a table saw and an angle jig. |
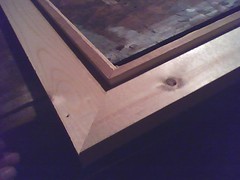 A good amount of wood glue on the edges and some corner clamps made a boxy “finished” frame. Clamp tight, and let the glue dry at least 15 minutes. The tighter you clamp it, the better the glue will penetrate, the thinner it will fan out, and the faster it will dry. A good amount of wood glue on the edges and some corner clamps made a boxy “finished” frame. Clamp tight, and let the glue dry at least 15 minutes. The tighter you clamp it, the better the glue will penetrate, the thinner it will fan out, and the faster it will dry.
Then I made another such piece one out of thinner wood strips (which I cut off a bigger piece with the table saw), this one with 1/4 of an inch less for the inner diameter. |
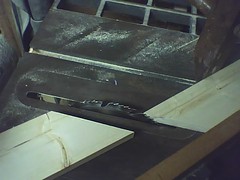
| When the pieces for this “smaller” frame were done, I rounded their edges on the routing table, and then glued them together on the main frame – creating a lip big enough to hold in the painting but still covering as little of its edges as possible. (You can see what it looks like attached to the frame in the above image, and you can see a cross-section of the routed pieces in the image below)
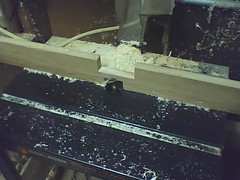 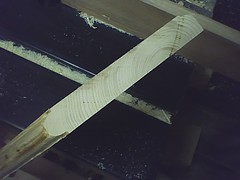
|
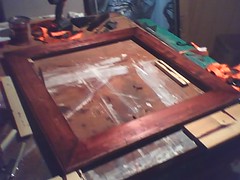
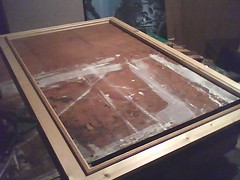 A wider view of the frame with the second “frame” glued to its top. A wider view of the frame with the second “frame” glued to its top. |
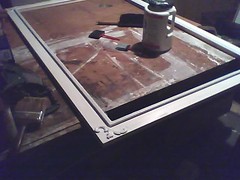 I added some wood appliques (available at Home Depot, Michael’s, Hobby Lobby) to dress up the corners some; I then took to covering the thing in a thin layer of gesso so the paint holds on better. Typically my finishing would mean I would stain, wipe, stain, wipe, stain, wipe, smooth, varnish, smooth, varnish, smooth, varnish… but such is a three day process (if I don’t miss a beat). I needed to get this frame done by morning- so… I added some wood appliques (available at Home Depot, Michael’s, Hobby Lobby) to dress up the corners some; I then took to covering the thing in a thin layer of gesso so the paint holds on better. Typically my finishing would mean I would stain, wipe, stain, wipe, stain, wipe, smooth, varnish, smooth, varnish, smooth, varnish… but such is a three day process (if I don’t miss a beat). I needed to get this frame done by morning- so… |
 I added a metallic finish to it (silver spraypaint), then soaked it in watered-down black acrylic, then wiped up the black save for the crevices, then brushed over it in black, and wiped the black away from the part that borders the painting. It looks like it is hewn out of decades-neglected silver or maybe pewter. I added a metallic finish to it (silver spraypaint), then soaked it in watered-down black acrylic, then wiped up the black save for the crevices, then brushed over it in black, and wiped the black away from the part that borders the painting. It looks like it is hewn out of decades-neglected silver or maybe pewter.
If I could go back and do it again (which I may someday down the line) I’d faux finish it a deep red oak. I thought about doing this – but I’d like to see if I can get two hours rest in before we have to leave. |
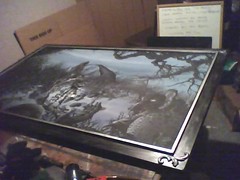 This painting is just popped into the back. I typically cover the back with some really heavy craft paper – but I don’t have nearly enough on hand for that. The hanging wire is fastened into the painting itself on this piece, the the frame is more of a decorative surround, not a means to hang by. I may however move the hanging wire to the frame, just to be ‘normal’. This painting is just popped into the back. I typically cover the back with some really heavy craft paper – but I don’t have nearly enough on hand for that. The hanging wire is fastened into the painting itself on this piece, the the frame is more of a decorative surround, not a means to hang by. I may however move the hanging wire to the frame, just to be ‘normal’. |
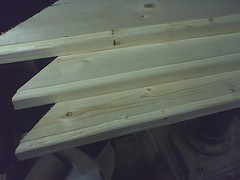
Below are some pics from another frame in progress. I routed both edges on one side (the inside edge), and rounded just one on the outside edge. The painting (a thin painting on hardboard) will rest within the router-made recess made in the inside edge). The outer edge has only one flat side so the assembled frame will sit flush against the wall.
I will probably stain and varnish this one – and will probably simulate the look of an age-old frame with multiple layers of stain, and leaving bits of extra stain in the crevices with each step.
