Posted on

Big Framing Adventure

When it comes to the expense of framing, shipping, the gallery’s percentage cut, the risk of needing to have things shipped back afterward, and all those instances where art gets stolen or damaged somewhere along the way, galleries close unannounced, or maybe never even existed – well, gallery showings are the sort of anxiety that I often find myself trying to avoid. For this reason I tend to prefer conventions if possible, or shows that are actually within driving distance.

And in those instances, I still often find myself in this sort of panicked state over things: Logistics, packing, unpacking, hanging, being around people all come in to play – but the highest anxiety of all, tends to come with framing.

Since I make most of my sales online, and since frames add significantly to the online selling price, and to the shipping cost – I tend to send my large originals unframed, unless otherwise requested – which means that I never bother framing them at all – until that rare chance to show someplace worthwhile and drivable presents itself… as things with galleries go, which often starts with a “showtime is two weeks from now and we need these in a few days”.

Being an artist, I never have money laying around to frame one piece, let alone three or five. If I ever find myself with a handful of bills to call my own, the money typically goes toward re-stocking on shipping tubes, getting a new run of merch made, having a run of prints printed, buying new canvas, new paints, something entirely new to try my hand at, or bigger and better versions of things I have, for making a bigger and better piece I’ve dreamed of being able to make.

If you are an artist who has ever needed something custom-framed for a coming show, and find that the framing stores have closed – or just cannot afford to have frames done at a gallery, or even craft store – a table saw (or a hand saw and a miter box) are often a god-send.

I typically make some pretty nice frames – though not as wonderfully ornate as those made from the sort of moulding that one can only get through a framing store, they are made from real wood – most often some really good real wood, and are incredibly durable and made to last. They also have a bit of hand-made charm to them, and often are a bit of artwork in their own.

Sometimes I add polymer clay, brass fittings, brass chains and ornaments, decorative tacks, wood appliques, or designs I have cut with a scroll saw; Sometimes I accent them through pyrography, or intricate carved details – they sky is pretty much the limit when making one’s own frames…

Well, the sky, time, and money…

This is one of those instances where money and time factored in more than most. This frame was not made from the chunk of fire maple I am saving for something, or the strip of cherry I am saving for something else – it was made from used pine, which came from supports for a stage set – though I almost used an antique door or two to have harder wood in this mix without using my reserved pieces.

Step 0: (Materials and Preparation):

Materials: Wood, wood glue

Tools: Saw, miter box (can be made with wood and saw), table saw (optional), clamps or straps or a bit of ingenuity to hold pieces tight until the glue dries, sand paper.

Recommended: Something to make the wood something more than just flat and boxy – such as a router, Wood burner, rotary tool, scroll saw, bits to decorate the frames with such as brass cabinet knobs, bits of chain.. the sky is the limit. Really, it depends on how intricate and perfect you want them – you can make them anything from folksy and bare, to contemporary and smooth/plain, to fine works of wood-crafting, to works of art in their own.

Preparation: I cut the pine pieces long-way with the table saw to make sure I had enough pieces, and that they were equally broad and equally thick. For the main part of the frame, I made two pieces that were 8 feet long, 3 inches wide, and 1 inch thick. From a 2×4 stud, I also made 2 pieces that were 8 feet long, 1 inch wide, and half an inch thick. You can skip that step if you can get to a hardware store and buy wood in this size – I recommend a few strips of select pine (heartwood pine) – It acts like hardwood, feels like hardwood, even *counts* as a hardwood to some – and is only about $3 a strip at Home Depot – buy 2 1x2s, 1x3s, or 1x4s, and one 1×1 – and you won’t need to do any length-wise cutting. If you do not have a table saw, a handsaw and a miter box will do. If you do not have a miter box – make one (3 pieces of wood, plus wood glue (or nails) and something the measure a 45 degree angle with). A good string wood glue in necessary. Ratcheting straps (tow straps) or corner clamps, or maybe even bar clamps if they are big enough for what you are working on – will save you a lot of frustration. Without pressure, the wood glue will take forever to dry, and your bonds will not be as strong or as clean. Paint, or wood stain, will probably also come in handy.

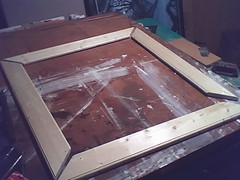
_Preview_.JPEG First step was to make a basic frame with an inside dimensions of 49×30 and outside dimension of 55 x 36. This construct is just flat wood and 45 degree angles – nothing fancy – all done with a table saw and an angle jig.
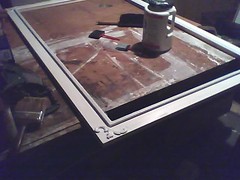
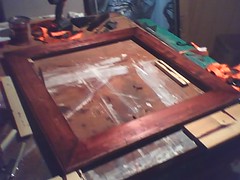
Frame in the worksA good amount of wood glue on the edges and some corner clamps made a boxy “finished” frame. Clamp tight, and let the glue dry at least 15 minutes. The tighter you clamp it, the better the glue will penetrate, the thinner it will fan out, and the faster it will dry.

Then I made another such piece one out of thinner wood strips (which I cut off a bigger piece with the table saw), this one with 1/4 of an inch less for the inner diameter.

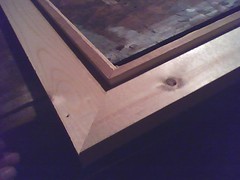
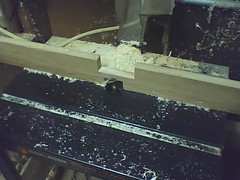
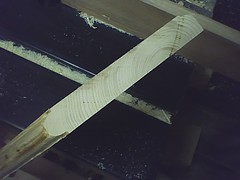
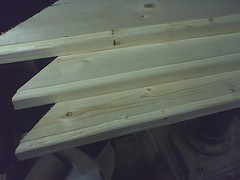
When the pieces for this “smaller” frame were done, I rounded their edges on the routing table, and then glued them together on the main frame – creating a lip big enough to hold in the painting but still covering as little of its edges as possible. (You can see what it looks like attached to the frame in the above image, and you can see a cross-section of the routed pieces in the image below)

_Preview_.JPEG_Preview_.JPEG

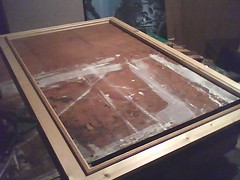
Frame in the worksA wider view of the frame with the second “frame” glued to its top.
Gessoed FrameI added some wood appliques (available at Home Depot, Michael’s, Hobby Lobby) to dress up the corners some; I then took to covering the thing in a thin layer of gesso so the paint holds on better. Typically my finishing would mean I would stain, wipe, stain, wipe, stain, wipe, smooth, varnish, smooth, varnish, smooth, varnish… but such is a three day process (if I don’t miss a beat). I needed to get this frame done by morning- so…
_Preview_.JPEGI added a metallic finish to it (silver spraypaint), then soaked it in watered-down black acrylic, then wiped up the black save for the crevices, then brushed over it in black, and wiped the black away from the part that borders the painting. It looks like it is hewn out of decades-neglected silver or maybe pewter.

If I could go back and do it again (which I may someday down the line) I’d faux finish it a deep red oak. I thought about doing this – but I’d like to see if I can get two hours rest in before we have to leave.

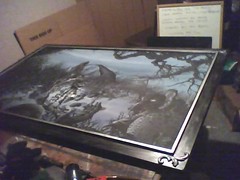
FinishedThis painting is just popped into the back. I typically cover the back with some really heavy craft paper – but I don’t have nearly enough on hand for that. The hanging wire is fastened into the painting itself on this piece, the the frame is more of a decorative surround, not a means to hang by. I may however move the hanging wire to the frame, just to be ‘normal’.

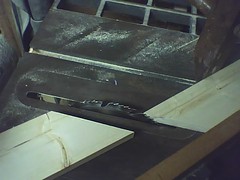
Below are some pics from another frame in progress. I routed both edges on one side (the inside edge), and rounded just one on the outside edge. The painting (a thin painting on hardboard) will rest within the router-made recess made in the inside edge). The outer edge has only one flat side so the assembled frame will sit flush against the wall.

I will probably stain and varnish this one – and will probably simulate the look of an age-old frame with multiple layers of stain, and leaving bits of extra stain in the crevices with each step.

_Preview_.JPEG_Preview_.JPEG_Preview_.JPEGStained

Posted on

Sneak Peek of the Mural from the Destination 1111 Show

Work in Progress - 30 foot wall mural by Bethalynne Bajema and Myke Amend

Work in Progress - 30 foot wall mural by Bethalynne Bajema and Myke Amend

Bethalynne and I set out to complete this mural by the end of Destination 1111. We painted till 1AM during the days leading up to the event; We also painted during the event all the way up to the event’s closing, but each of us got taken away from the project for carious things over the weekend more than expected – most of these distractions being pretty awesome ones. It was nearly complete when we left 1111, but tomorrow we’ll have to have it hauled home and finish it in the garage… it should be done this week.

So… anyone in need of over 30 feet of artwork for their home? … It *is* sectional (3 ten foot panels)…

Oh… I do a lot of gum chewing and mumbling in this film, as I had no idea there was a camera on me…

Posted on

BIIIG Painting

Me - Painting a big one

A whole mess of other photos HERE and HERE

This year for the Artprize competition (Grand Rapids Michigan), well, there is a whole lot of craziness in there- long story short, because of pencil pushers we are starting our painting at the start of ArtPrize (rather than having it done before artprize), and our other artwork is at One Girls Treasure on Lyon street, and our musical acts and sideshow acts are at the Bob… right next to the Steampig – our best co-contestant friends and favorite competitors.

This is the last part of our work, painting on the actual lot that is our venue -and it is HUGE!I have never painted this big before and it is a hell of a lot of fun were it not for the sunburn and the sore knees and back.

Here is the fun part though… forget I said anything about sunburn or sore backs- if you have the will to do so, YOU CAN BE A PART OF THIS!… yes… even if you do not trust yourself within five feet of a brush, you can fill a large area with a roller – and for those feeling their arty ability – there is plenty of room for that as well.

If you would like to help out, drop in at 530 Monroe avenue between the hours of 10:30 AM and 11PM, pick up a brush, let us know how confident you are, and we’ll make up some sort of shit for you do do… FREE OF CHARGE!

… or just drop in and say “hi”, by some t-shirts if you must (or buy them ONLINE)… but if you can, come down and see us and our painting – no matter the reason.

Posted on 1 Comment

Opening Day at ArtPrize

I was hoping to have this piece done by the early hours of the morning – a wood carving and painting. About 52 inches by 48 inches – mahogany, walnut, and pecan stain on carved birch panel.

I still need to build a box out of it, fill the box with foil and LEDs and wire, drill holes where I want lights, varnish it, line the holes with gold leaf, and put several coats of wax on it… probably about another 8 hours or so…

But I thought you might appreciate a progress pic (bottom)

Artprize has been several months of crazy for us – everything falling through one thing after another, and being given the run around from so many different directions. Artprize opened today, and we only got access to our venue yesterday, where we are working on a huge painting, the slimmed down version of our big circus, architecture, and art extravaganza.

If you are coming out for that – don’t worry, we found new homes for all of our acts (most are at the BOB at their scheduled times), found a place to host our artwork (One Girls Treasure on Lyon Street), and put together many picnics throughout the Artprize grounds and throughout the 19 days of Artprize.

Our art installation at One Girls Treasure is amazing BTW – much thanks to Bethany Grenier, Kate Jauw, and of course Bethalynne Bajema.

We are still recovering financially from all the AAAAAAAAAAAAGHHH! – and still have a bit of fundraising we can stand to do… especially Bethalynne and I who have pretty much gone sleepless and foodless and put aside all other work through this whole endeavor. I don’t want to get any more behind on shipping, so I introduced the SUPER SPOOKY STEAMPUNK GRAB BAG of AWESOME – which will ship just in time for Halloween. What is it??? I have no idea!!! But they are $15 and I will load them with more than $15 worth of incredible things from this project and something unique to these grab bags.

Proceeds of course go to building supplies and some spaghetti maybe. These are available for a very limited time, and until they run out.

A quick snapshot of the work in progress - Gadreel over Machinac Bridge
Posted on

Tees!


CirqueACirca Cotton Tee

Our beautiful shirts from Extreme Screen Printing have arrived. They are printed in 2 colors on an all-cotton heavyweight desert sand colored t-shirt – with art by Bethalynne Bajema, an incredible logo design by Ted Jauw, layout/pre-press by Myke Amend, modeled for by Cassie Truskowski, and loved by everyone who sees them.

Buy yours here: http://cirqueacirca.com/artprize/?page_id=131&category=5&product_id=26

Posted on

Indonesian Rijstaafel (Feast!)

Our last gathering (an artist’s and performers fundraiser for CirqueACirca & The 121st Retronauticon) was a great time for all, and we are doing it again. Come out and meet the crew, have some amazing curry and a spot of tea (vegetarian options available), and meet and mix with many other artists and arts supporters. Details below:

1537 Fulton St. E. Grand Rapids – Saturday, September 11th, 2010 – 7PM to 11PM

*Indonesian RijsTaffel (Rice Table)
*Meet the Crewe (Strong & Able)
*Post Fashion Night Out! (Stytche And Bytche!)
*See the Model (Hear our Pitch)
*Steampunk Chocolate Fountain (you’ll never leave)
*Get a “Love” Tattoo (Roll up you sleeve)
*Join the Circus (Sign the list)
*Buy the T-Shirt (Don’t be missed…)

See the Event Page at
http://www.facebook.com/event.php?eid=152122114811763
(R.S.V.P. if you can, but you don’t have to)

12 noon (early-comers) – Make a SteamPunk Dress at our Stytche & Bytche
6pm – Volunteer meeting and sign up
7pm – Rijstaffel feast

$5 suggested donation (don’t let that stop you from coming though – )

Posted on 1 Comment

Join the Circus

Some of you may already be aware of this, but this year I am participating in Grand Rapids’ Artprize competition along with Bethalynne Bajema, Ted Jauw, Kate Jauw, Bethany Greenier, John Hyatt, and Cassie Truskowski, with our combined work CirqueACirca.

We are putting together a work of art nearly the size of two football fields (a very ambitious project for a couple of artists with less than two nickles to rub together). This work will be a huge undertaking to say the least, and will include circus and sideshow performance art, among many many other things.

We hope that it will become a gathering point for steampunks and other like-minded individuals during the competition, in a joint effort with the SteamPig display and several other steampunk exhibits through the vast art competition (over 200,000 visitors last year). Our space will have a lot of room to rest your feet and hang out, and costumed up visitors add the the feel of the piece.

We hope that you will help out by being there September 25th (the main gathering date), or any date between September 22nd through October 10th.

If you would like to more actively participate and help out, there are *MANY* ways to do so – from helping us starving artists to starve a bit less, to easing the strain of gathering materials for this huge project (we hope to use as much recycled material as possible), to lending a physical hand on the build, or just getting the word out for us (because every person you know may know someone interested, or the people they know might know someone interested).

Please link to us in your blogs, facebook accounts, myspace, twitter, or otherwise… because popular makes popular these days, and the more people our message reaches, the greater we can make this event.

Cirque A Circa Poster by Bethalynne BajemaArtists: Those of you with a creative touch to help with painting and set up. It could be anything from plain flat painting to helping with the mural.

Roustabouts: Help during the event. Answer visitors questions, help with merchants/artists needs, etc.

Carnies: Merchants who share our vibe and intent may rent tents to sell wares.

Players: We need people to dress up in a steampunk or circus fashion and just walk around while adding to the vibe!

Buskers: Do you have a fun talent to share? Juggler, stilt-walker, etc.? We have a place for you in Buskers Alley.

Oddities: Do you have a very unusual art to share? We have a place for you to create and show off your talent.

Stowaways: The price for your passage is to help keep our ship clean! We will need people to keep an eye out for loose ties or malfunctions, pick up trash, make sure signage is still in place, etc.

Acts: Looking for acts willing to work with us to develop great shows and have an opportunity to show off your stuff.

And the rest: Did we fail to mention something? Let us know! There is a place for you in our circus!

Posted on

Sorry Charlie

One of several possible layouts or poses for his sculpture
Sorry Charlie - fine art sculture by Myke Amend

He came to the surface world, wondering where all the food had gone, but there were no fish to be found on land.

There was however an abundance of two legged meat-things… they tasted somewhat like seals; Perhaps even enough to save his kindred, and maybe enough to last till next season.

All he knew, was that he had to return to tell the others, but maybe after just one more meal or two…

All pieces were sculpted, hand-painted, silver-leafed (cans of tuna), and hand-varnished by Myke Amend and come as a set. The wood barrels and scrapbooking paper aren’t included, but could be if you really want them.

Sorry Charlie - fine art sculture by Myke Amend
One of several layouts fo rthis sculpture

One of several possible layouts or poses for his sculpture; I envisioned it with Charlie on top of the crate looking up pitifully, with a few old cans of tuna laying about the scene (as above), but I really have a hard time choosing just one. There are more images, including closeups on the Etsy Page at ettadiem.etsy.com.

The set includes Charlie the sea monster, 3 tuna cans, “wooden” (polymer clay) crate, and crate lid:

“Charlie” is about 3.5 x 2 x 2 inches. His eyes are made out of brass, and all scales, shading, and countershading are hand-painted on.

The Polymer Clay crate is roughly 4.5 x 3.5 x 3.5 inches.

Tuna cans are tiny… really tiny.

This is a fine art sculpture, and is *not* a toy. It is *not* intended or recommended for anyone under the age of 18.

I put a lot more work into this than I expected to. My first thought was to make something quick I could sell for $40 or so, but then I decided to use brass for eyes, then to hand-brush and shade scales onto him, then to make the crate out of clay instead of weed, then silver leafing the tuna cans for a more realistic look… I’d sell it for $300 for all the work that went into it, and its uniqueness (only one of its kind), but right now it is up for $145 on Etsy.

We are putting a lot of time and resources into our Artprize bid… a $5,000 estimated expense, between 5 people who can barely scrape together a handful of change (i.e. artists, post-July,2008). So, if you want to make good of our situation, this sculpture is available online until we have the fundraiser/teaser for the event – in which case it will be on sale there.

Posted on

Undeath from Above

Undeath fromabove detail 1
Undeath from Above detail 1
Undeath fromabove detail 2
Undeath from Above detail 2
Undeath from Above
Undeath from Above

The original was drawn in pen and ink on 11×14 inch Bristol Board, I did the coloring with my 4-year old Adesso drawing tablet so as to preserve the pen and ink original.

The Black and White version is the Cover for Gatehouse Gazette #14, my third cover for them.

I am making only 20 of these full-sized giclees. Total size with 1? border is about 13×16 inches. They are printed on cotton-weave fine art rag paper in archival pigment inks for the sort of superior clarity and color quality expected from a giclee print.

The giclees are available at a reduced price of $55, HERE

8×10 inch metallic prints are also available, and also at a reduced price ($15), HERE.

Posted on

Red Hand Assemblage

Red Hand Assemblage Showing Hand
Red Hand Assemblage

This artwork is three in one.

The box/dual frame: I labored hard for over a week on the box, which is a very sturdy hand-built, hand-stained, hand-varnished, hand-waxed chunk of quality hardwood (heartwood select pine base and birch sides). It not only serves as a box (if you would want to use it as such a thing), but as a self-contained double frame which requires no wall hanging. It is perfect for a coffee table, end table, mantle, dining table or most any flat surface you would like to display it on… and it is so sturdy in construction that you won’t be freaking out if people get near it.

Red Hand Assemblage Showing Both

The box has two decorative hinges with a decorative patina on the spine edge if it; The latching mechanism is self-made from another smaller version of these hinges, combined with three solid brass model cannons from a model ship. The latch holds the piece securely shut, but opens easily when you want it to with a slight squeeze of the box and an easy flip of the thumb.

Latching Mechanism detail

I spent hours and hours and hours buffing and buffing this piece. You may not see the glossiness of it in the picture, but it is pretty shiny.

Open Assemblage Box Frame closed
Red hand Assemblage Box Frame closed (standing, latch side)
Red Hand Assemblage Open
Red Hand Assemblage Open, spider side showing
Open Assemblage Box Frame closed
Red Hand Assemblage Box Frame closed

Sometimes antiquing involves making something look beaten and ratty, sometimes it is a matter of making something look like something of quality kept new by an archivist or generations of enthusiastic caretakers – quality and new as the day it was made. For this particular look, I went with making it look like somewhat well-maintained antique… something once very expensive, polished periodically by its owners – well protected, but also well-used.

This sort of antiquing makes it much more involved than the other two. When I do this sort of antiquing on fresh and new untreated wood, making it look fashionably old is essentially a process of finishing and refinishing it to duplicate what time would do: Creating many stages of maintenance and multiple areas of color to create the look of something old… dark areas near crevices and hard to reach spaces, lighter areas where regular wear might occur.

Open Assemblage Box Frame on its side

The Art: To make these illustrations mesh well with the box, I made them in this dark-carnival, old Victorian occult ephemera style, with a lot of metaphysical flavor and a touch of campy horror propmaking. It not only made them work well with the box I envisioned, but made them fun for me and strikingly bold… a primitive and stark contrast to my normal reserved and detailed works and my muted color palettes.

Red Right Hand detail
Red Right Hand

Painting One: “Red Right Hand” this is one of two pieces done for a collaborative collection of China Miéville inspired illustrations and artworks, an effort assembled and coordinated by John Straun of SuperPunch. The Handlingers are mind-controlling creatures which look much like a human hand with a snake’s body. I decided on red for my colors because I wanted the hand to be red, and I might it a right hand just so I could name the piece “Red Right Hand”, because I am a huge Nick Cave fan.

Limited Edition Giclees (limited edition of 20) are available in my store

Red Right Hand detail
Weaving Spiders Come Not Here

Painting Two: “Weaving Spiders Come Not Here”: I often name images for all of the phrases that swim around in my head. I don’t know what it is about soliloquy, sayings, proverbs, historical quotes and other such things that causes them to remain so well-embedded. I start working on a piece, and once he concept is in place, I immediately think of some string of words that fits, though usually a twist thereof. Rarely does the phrase inspire the piece, but the piece typically inspires the title, and the title sometimes shapes the work… this title coming from Shakespeare, or the once-curious reliefs seen outside of Bohemian Clubs. “The Weaver” is a large sentient spider with hands on its forelimbs (I also put them on its Pedipalps), with a love for scissors. The Spider with scissors brought this phrase to mind, so rather than repeating the more circular designs from the previous painting, I made them weave like webs, being cut by the spider.

Limited Edition Giclees (limited edition of 20) are available in my store

Weaving Spiders Come Not Here detail
Open View
Open View

SuperPunch: Superpunch.blogspot.com
China Meiville: Rejectamentalist Manifesto

All three works – the dual frame box assemblage, and the two paintings, are available as one piece in the originals section of my store.