Posted on 1 Comment

Airships and Tentacles – my new 140-Page Art Book

Over the past months I have been tapping away at keys, collecting scans of artworks old and new and even a lot of forgotten works, in order to make a very intensive book of my works to date.

At first, it was only going to be the Airships and Tentacles series, but I began to use “lost” artworks for section endings, and decided I should include old paintings from before the series, as well as all of those pieces I have worked on during the series as album covers, book covers, commissions, illustrations, or things I did during the series just to clear my head and work on something different. It even includes a few samplings from my-yet-to-be-published literary works, and some pieces I’ve done relating to the works of others (Voltaire, Clive Barker, Dexter Palmer, Bethalynne Bajema, and others), and collections of doodles and sketches to decorate text pages (such as the Table of Contents, Words from the Artist and other sections)

The book has a cover specially designed by Bethalynne Bajema from my existing artwork, and I *love* what she did with it. Click the image or link below to view as a PDF online, or right click (recommended) to download and view in 2-page side by side book format.

This book is available NOW as a preorder, shipping August 5th. Click here to buy.

Posted on 1 Comment

Black Ships Ate the Sky

I started this, thinking I was going to take an 8×10 pencil sketch and make a neat water-colory looking piece of it, or maybe just smooth it out and make some edits.

I began by making it 16×20 at 400 DPI, and then took to smoothing out all of my pencil grainy-ness. I chose this size, because I like my works to be high resolution, and my prints to be perfect – I also always consider that I might finish a piece, and then wish I had made it available much bigger.

The downside to working digital for me, is that can I zoom in to where I can see the individual pixels when it comes to detail… I begin just doing this for one part, then realize that the entirety of the work now needs to be in this ultra-high resolution – and set off on a journey of exploring a miles-square map of pixels for.. as long as it takes… in this case, over 300 hours I really did not have to spare. I think I spent nearly two weeks planning on being done “tomorrow”.

It was certainly a way to indulge though – as an artist these days, I don’t always get the chance to put so much work into one piece – though I do put a tremendous amount of work into every one comparatively.

From pencil sketch, to over 2 gigs of file size, hundreds of layers of painted elements, plus all the modification layers for overlay, lightening, darkening, color, multiplication, saturation, etcetera…

About a day or two in, I decided it would be a great idea to actually log the process for this one… and I saved a lot of progress pics.  Below, you can actually see the details of the finished piece. One thing with all of my paintings and other images: Web resolution will never let you see how packed with detail every inch is, or all of the interesting scenes, items, and mini-artworks semi-hidden throughout the painting.

Below that, I’ve added my progress pics – for people who are interested by such things.

Oh… if you would like to buy printings of this: There are giclees available in my store – There are also poster prints and photographic prints available at our Redbubble shop – Also in my DeviantArt account.

Image and details:


Progress Pics:


A rather rough sketch… these were quickies done for $25 a pop for bus fare a year or so back. The paper type really did not allow for erasing, so they were one-shot deals. I liked the concept and base layout enough, I thought I would do some digital work on it to make it print-ready.


A lot of steps went by before I realized it was going to be a much bigger project than I planned. It was the point where I was fleshing out this airship where I decided some screen caps would be good. I had started on the girl, switched to the airship, cut my pencil work out to its own layer, and placed other airships where I wanted them, as placeholders for the sake of layout.

I blacked out the girl for this stage, I didn’t want its pencily quality drawing my focus from the background I was working on.


head/face. This part took all of my night – so not much else has changed.


boots and leggy things… I put a lot of base work into this, then decided I would need to enlarge the feet, and widen and lengthen the lower legs. I write notes to myself whenever there is something important I want to hit first thing the next day… you’ll see these notes in other screen caps below.


The very beginnings of the holster and belt… I would later go in further, and further, sharpening up these details, then making details within these details… and sharpening those up. Oh, you can also see the base/beginning brushings of her stripey-pants.

… and done.

Posted on

Blue Things

Yeah, I know, people have gotten pretty used to me making with the fantastical steampunk stuff – but there are a lot of times when the things in my head aren’t exactly in the genres I’m known for, often times these things aren’t exactly things people would want hanging on their walls, or even like.

That, is perfectly okay.

I took a 6-month break from showing anything new here – not that I stopped creating, but I was building big things, painting big murals upon them, working large scale in everything from the art itself to the undertaking as a whole… I managed 7 new paintings – each 3 foot by 7 foot, and can’t show them right now as I have no budget for imaging them.

I’d like to say I am working on something even bigger than that, but I am working smaller for a bit – less over the top, less fantastical, less with the huge.

… Some of this, is because the project, and all that time, really tapped me out emotionally, physically, and otherwise – I may have shot my life completely down the tube, I don’t know – I’ve lost my faith in humanity save for a small handful of people I met and worked with during the process, and have lost all hold on any illusion that there is any hope for a real arts scene or art happenings in the town I am currently living in and my thoughts in general on art as a living: expletive filled and feeling rather final.

Until I find a job, hopefully something good and hands-on, blood and sweat and not having to deal with people variety… landscaping, construction, etc…

I guess I still have to do whatever I can do, manage whatever I can manage, every day, regardless – so I do what I can do, which is painting, on what I have available to paint on.

I’m finding bits of board and unused canvas around the house big enough to do paintings on, and painting away for no one and no reason in particular.

I think some might call this “freedom”.

If you liked the sorts of things I spent the last few years painting – well, there were ways to express that – Just downloading images, wasn’t it.

But, for those who missed all the oddness and ugliness… well, it seems that I am back in that regard, and will paint new things, whenever I feel like it, whenever I have stuff to paint on.

I’m not done being an artist – I was born that way, I’ll die that way – I am just feeling rather done with *this*.

I am going to go back to breaking my back for a living, because I’d enjoy that a lot more than watching the internet for a non-living. I am going to wrap all my works up as I make them, store them up, list a few here now and then, and show them if and when a chance to show them someplace good comes up.

Anyway…

My latest two pieces are painted on 8×10 inch scraps of birch. They are filled with tiny details. They are the product of free-painting, with no particular image, story, or anything in mind short of the current element leading into the next and tying in with the previous. I suppose this is leading a lot more toward the style of my older, more surreal works, and I am exploring that for a while… contemplating how I will break that formula on the next, reflecting on missed chances in the previous…. building toward something, though I have no idea what, nor do I care.

I’d say more, but I still feel that people who like to talk a lot about their work, should be spending that time working.

Good night.

Same Deep Water as You
Deeper
Deeper
Posted on

Big Framing Adventure

When it comes to the expense of framing, shipping, the gallery’s percentage cut, the risk of needing to have things shipped back afterward, and all those instances where art gets stolen or damaged somewhere along the way, galleries close unannounced, or maybe never even existed – well, gallery showings are the sort of anxiety that I often find myself trying to avoid. For this reason I tend to prefer conventions if possible, or shows that are actually within driving distance.

And in those instances, I still often find myself in this sort of panicked state over things: Logistics, packing, unpacking, hanging, being around people all come in to play – but the highest anxiety of all, tends to come with framing.

Since I make most of my sales online, and since frames add significantly to the online selling price, and to the shipping cost – I tend to send my large originals unframed, unless otherwise requested – which means that I never bother framing them at all – until that rare chance to show someplace worthwhile and drivable presents itself… as things with galleries go, which often starts with a “showtime is two weeks from now and we need these in a few days”.

Being an artist, I never have money laying around to frame one piece, let alone three or five. If I ever find myself with a handful of bills to call my own, the money typically goes toward re-stocking on shipping tubes, getting a new run of merch made, having a run of prints printed, buying new canvas, new paints, something entirely new to try my hand at, or bigger and better versions of things I have, for making a bigger and better piece I’ve dreamed of being able to make.

If you are an artist who has ever needed something custom-framed for a coming show, and find that the framing stores have closed – or just cannot afford to have frames done at a gallery, or even craft store – a table saw (or a hand saw and a miter box) are often a god-send.

I typically make some pretty nice frames – though not as wonderfully ornate as those made from the sort of moulding that one can only get through a framing store, they are made from real wood – most often some really good real wood, and are incredibly durable and made to last. They also have a bit of hand-made charm to them, and often are a bit of artwork in their own.

Sometimes I add polymer clay, brass fittings, brass chains and ornaments, decorative tacks, wood appliques, or designs I have cut with a scroll saw; Sometimes I accent them through pyrography, or intricate carved details – they sky is pretty much the limit when making one’s own frames…

Well, the sky, time, and money…

This is one of those instances where money and time factored in more than most. This frame was not made from the chunk of fire maple I am saving for something, or the strip of cherry I am saving for something else – it was made from used pine, which came from supports for a stage set – though I almost used an antique door or two to have harder wood in this mix without using my reserved pieces.

Step 0: (Materials and Preparation):

Materials: Wood, wood glue

Tools: Saw, miter box (can be made with wood and saw), table saw (optional), clamps or straps or a bit of ingenuity to hold pieces tight until the glue dries, sand paper.

Recommended: Something to make the wood something more than just flat and boxy – such as a router, Wood burner, rotary tool, scroll saw, bits to decorate the frames with such as brass cabinet knobs, bits of chain.. the sky is the limit. Really, it depends on how intricate and perfect you want them – you can make them anything from folksy and bare, to contemporary and smooth/plain, to fine works of wood-crafting, to works of art in their own.

Preparation: I cut the pine pieces long-way with the table saw to make sure I had enough pieces, and that they were equally broad and equally thick. For the main part of the frame, I made two pieces that were 8 feet long, 3 inches wide, and 1 inch thick. From a 2×4 stud, I also made 2 pieces that were 8 feet long, 1 inch wide, and half an inch thick. You can skip that step if you can get to a hardware store and buy wood in this size – I recommend a few strips of select pine (heartwood pine) – It acts like hardwood, feels like hardwood, even *counts* as a hardwood to some – and is only about $3 a strip at Home Depot – buy 2 1x2s, 1x3s, or 1x4s, and one 1×1 – and you won’t need to do any length-wise cutting. If you do not have a table saw, a handsaw and a miter box will do. If you do not have a miter box – make one (3 pieces of wood, plus wood glue (or nails) and something the measure a 45 degree angle with). A good string wood glue in necessary. Ratcheting straps (tow straps) or corner clamps, or maybe even bar clamps if they are big enough for what you are working on – will save you a lot of frustration. Without pressure, the wood glue will take forever to dry, and your bonds will not be as strong or as clean. Paint, or wood stain, will probably also come in handy.
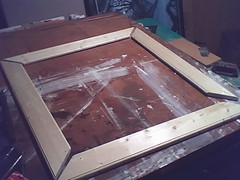
_Preview_.JPEG First step was to make a basic frame with an inside dimensions of 49×30 and outside dimension of 55 x 36. This construct is just flat wood and 45 degree angles – nothing fancy – all done with a table saw and an angle jig.
Frame in the worksA good amount of wood glue on the edges and some corner clamps made a boxy “finished” frame. Clamp tight, and let the glue dry at least 15 minutes. The tighter you clamp it, the better the glue will penetrate, the thinner it will fan out, and the faster it will dry.

Then I made another such piece one out of thinner wood strips (which I cut off a bigger piece with the table saw), this one with 1/4 of an inch less for the inner diameter.

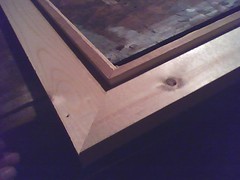
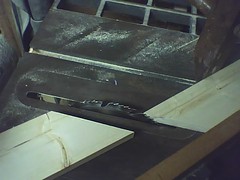
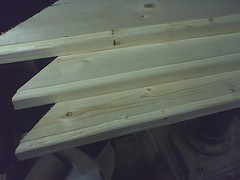
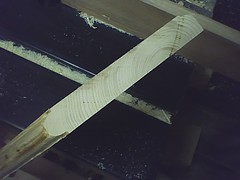
When the pieces for this “smaller” frame were done, I rounded their edges on the routing table, and then glued them together on the main frame – creating a lip big enough to hold in the painting but still covering as little of its edges as possible. (You can see what it looks like attached to the frame in the above image, and you can see a cross-section of the routed pieces in the image below)
_Preview_.JPEG_Preview_.JPEG

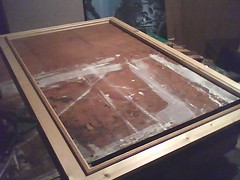
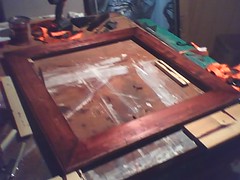
Frame in the worksA wider view of the frame with the second “frame” glued to its top.
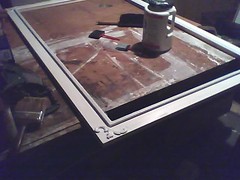
Gessoed FrameI added some wood appliques (available at Home Depot, Michael’s, Hobby Lobby) to dress up the corners some; I then took to covering the thing in a thin layer of gesso so the paint holds on better. Typically my finishing would mean I would stain, wipe, stain, wipe, stain, wipe, smooth, varnish, smooth, varnish, smooth, varnish… but such is a three day process (if I don’t miss a beat). I needed to get this frame done by morning- so…
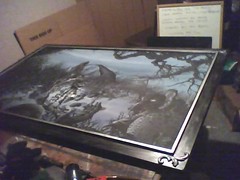
_Preview_.JPEGI added a metallic finish to it (silver spraypaint), then soaked it in watered-down black acrylic, then wiped up the black save for the crevices, then brushed over it in black, and wiped the black away from the part that borders the painting. It looks like it is hewn out of decades-neglected silver or maybe pewter.

If I could go back and do it again (which I may someday down the line) I’d faux finish it a deep red oak. I thought about doing this – but I’d like to see if I can get two hours rest in before we have to leave.

FinishedThis painting is just popped into the back. I typically cover the back with some really heavy craft paper – but I don’t have nearly enough on hand for that. The hanging wire is fastened into the painting itself on this piece, the the frame is more of a decorative surround, not a means to hang by. I may however move the hanging wire to the frame, just to be ‘normal’.

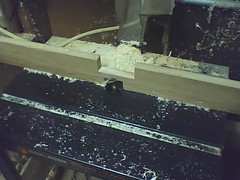
Below are some pics from another frame in progress. I routed both edges on one side (the inside edge), and rounded just one on the outside edge. The painting (a thin painting on hardboard) will rest within the router-made recess made in the inside edge). The outer edge has only one flat side so the assembled frame will sit flush against the wall.

I will probably stain and varnish this one – and will probably simulate the look of an age-old frame with multiple layers of stain, and leaving bits of extra stain in the crevices with each step.
_Preview_.JPEG_Preview_.JPEG_Preview_.JPEGStained

Posted on

Big Canvas Sale!

The Machine - By Myke Amend, available as a gicleeWhy??  Well… I was going through and testing my cart, and found that the price for giclees on canvas did not auto-update inline when selecting canvas stretching mounting options.

I also realized that about the time I started offering these options, I started selling the things a lot less often.

Maybe it was too confusing, maybe too many options makes it harder to choose, maybe it was the price difference from page to shopping cart, or all of the above – but since I was editing all of these, I decided it would be a good time to make a sale of some sort, and to make it big.

So, here it is – All giclees are priced drastically below normal, and the shipping fees that *should* be there $30 in shipping for most, are not there at all… yep.. $5 flat rate shipping on all orders.

All giclees are printed in Archival pigment inks on archival canvas, and protected by a UV-resistant coating for an estimated archival rating of $200+ years.

These beautiful and super-accurate reproductions are pretty much indistinguishable from the original paintings, and most are limited to 50 or less… that means that out of 60-some billion people, only 50 will own a print – ever.

These come with certificates of authenticity, printed on Hahnemuhle fine art paper, signed and numbered by me, with matching serialized holograms affixed to the certificate and the back of the canvas, to protect the value of your investment, and because they are shiny.

I put them all nice and neatly into one section, the “Canvas Sale” Section, here: https://mykeamend.com/products-page/canvas-sale/

Posted on

Old Becomes New

It was brought to my attention yesterday that there were a number of prints which were not available in the current incarnation of my site – the result of starting anew on the store I suppose.

Looking through the collection, and cross-comparing, I’ve found at least 40 available prints of at least 15 artworks which never made it back to this site when the rebuild was done.

I’ve added a few tonight, and may add a few more soon. Mostly these are my darker works from over previous years.

I’d also like to start moving ahead and making screen printings of a lot of my engraved images, though I am not quite sure if I am going to make special screen prints for wall hanging, t-shirts, or other items in this course – I believe I will be leaning more towards the t-shirts, bandanas and patches – as I’ve already giclees of most of the engravings.

There will also be some books returning. I am remixing my comic book, starting from the ground up in a lot of places, deleting scenes, adding new ones – and leaning more towards the serious and slightly comedic intended work – less towards the wacky shock humor bit it had become. I’ll have related merch for that when done, but if anyone is interested in any of the remaining comics (there were only 100 of which printed), well just go ahead and contact me for those.

My children’s book, 2 years in the not-making, is next on the slate – I do however have two painting commissions to finish (one of which a book cover for a fave author), and some book illustration (interior work) to do for another author friend of mine.

Anyway – I see a lot of great things coming for this site, and will have a lot of news to give in the coming year. I have a good feeling I will find more time to get more of these projects off my plate come January – but for now – watch for the release of two new paintings (and giclees from them) sometime between December 25th and January 10th.