Posted on 1 Comment

Exhibitions

These are just a handful of upcoming and past appearances.

I do have many more appearances in mind this coming year, to be announced – and my mind is so fuzzy on the older ones, so I’ll add them as they come to me.

I’ll also update a lot of this with proper links gradually over the coming weeks.

Current/Upcoming:

“The Low Life” at Ice Cream Gallery and Toys in Grand Rapids, MI. Ongoing.

Steampunk Symposium at the Crowne Plaza Cincinnati North in Cincinnati, OH. April 26th through 28th, 2013.

Past Appearances:

Urban Lights Holiday Market at Ice Cream Gallery and Toys in Grand Rapids, MI. December 8th 2012 from 12PM to 9PM.

2012 World Steam Expo in Dearborne MI (Vending)

2012 Steampunk Symposium in Cincinnati, Ohio (Guest, Exhibitor, Vendor, and Panelist)

“Steampunk Soiree” at the Revolving Museum in Lowell, MA Feb 7th through March 3rd 2012

Mobilus in Mobili at Wooster Social Club in Soho NY (Exhibitor : filming of steampunk NY Ink Episode)

Artprize 2011 – (Guest and Exhibitor) at the Gerald R. Ford Museum in Grand Rapids MI.

Maker Faire 2011 Detroit (Guest and Exhibitor)

2011 World Steam Expo (Guest, Exhibitor, Panelist)

Steampunk Form and Function at the Charles River Museum of Industry and Innovation in Waltham, MA (Exhibitor)

Artprize 2010 (Exhibitor)

Lift Off! at Gallery Nucleus in Alhambra CA, January 9, 2010 – February 1, 2010 (Exhibitor)

Horrorfind Weekend 2006 (Exhibitor)

Pittsburgh Comicon 2006 (Vendor/Artist)

Posted on 2 Comments

The Artist’s life: Myths and Misconceptions

This post is for those who are aspiring artists, those who are living the artists’ life/fighting the good fight, those want to know what the typical artist’s life is really like, those who erroneously assume we are on some pedestal above the working class, and especially those who see us as something lesser than the hard-working masses.

I really enjoy what I do, and I enjoy every person I interact with online, and every person I meet at shows and conventions along the way, when we are able to make conventions anyway.

Often times, I find myself being labeled or referred to as a “successful artist” – and I suppose that, if artists were paid in web hits, kind comments, web features, magazine features, book features, television news spots, peer/colleague recognition, and used bandwidth, that just may be… And, really, there could be nothing better, save for that ever-distracting rumbling from within…

– Some people mistakenly think that being an artist means not having to work – joyfully stroking away at a canvas with a very long brush so we can still recline in a golden hammock, while dining on peeled grapes and supervising our apprentices to urinate more passionately upon a silk-screened soup-can.

– Others assume that being an artist means not wanting to work, as if we spent all of our days on play and recreational drugs, and only picked up a brush to avoid “real work”, or maybe just to have something to offer for money… like that guy on the corner offering to sell you a handful of dumpster findings from his pockets, because he knows you’d rather just give him 50 cents.

For an actual artist, one who lives for art, and lives as an artist, *neither* assumption could ever be farther from the truth:

Now, I am talking actual artists here: Not those jet-setters who would gladly have fame rather than create something worthwhile – Not those coke-headed scenesters to whom “art” is rubbing elbows with the wealthy over champagne while conversing about the deep and existential meanings behind sloppy paint on a half-assed doodle ready-made to satisfy the “chic” galleries’ demand that an artist produce 12 pieces a month to be considered – Not the “I’m gonna splatter this paint on a canvas” guy you see making a living off 5 minutes work per $50 painting (or sometimes $4,000,000 painting).

… No, I am talking about those who couldn’t live without being able to create things worth being proud of, and would gladly die of starvation or lack of sleep if it meant finishing that one last work… which in its conception and crafting is nothing short of amazing, but completed, will never, ever be good enough, but always one step closer… while never anything worth patting oneself on the back over.

Even a step backward is a step forward, every failure is a triumph. We learn through experience, improving our art through noting the good and the bad – and for all the works you’ll ever see, are at least three that get crumpled, scrapped, abandoned, burned, or shot and buried ceremoniously.

Artists included – Any of us who struggle to work for ourselves, are the most tyrannical of bosses – We typically spend 16 to 36 hours at a time on our work between 4 to 10 hour naps, grabbing a shower or a bite to eat when there isn’t an important deadline to meet, or paint threatening to dry on the pallet. (I’ve managed over 150 hours of straight-painting in my worst/best days – bathroom breaks and Mountain-Dew refills excluded).

On the very best days, those hours are spent on art alone, though those days rarely come – so the days get longer and longer, bedtime gets that much further away, just so some actual art can be managed before “day’s end”..some 48 hours later.

If we are doing well online, much time goes into ordering tubes and packaging, ordering prints, wrestling with cardboard and glue to make painting-shaped boxes, rolling prints, printing labels, signing things, making certificates, running to and from the post office… it keeps us from our work, but it is happy work. Sending my art to hang in the home or office of another person keeps us going, emotionally and financially.

The rest of our time is spent writing blog entries, redesigning our sites, managing our “social” network pages, creating sales, adding new products to the web, looking for affordable advertising, logging clicks and cost, submitting to boards and sites and magazines, answering our email, waiting for others to answer theirs, looking for new markets or merch like skins and tattoo flash and tee shirts and such, and doing work for others to make ends meet: Web design, ad design, various other things “artistic” which are not “art” and often soul-sucking – especially that every hour spent here, could have been another hour of painting.

Things being what they have been these years, we spend more and more time on the latter, less and less time on the former, and all those extra hours of tearing our hair out and staring into this screen, mean bedtime is that much further away if we are to get any actual painting or drawing done… because an artist who does not create, is not an artist, but a “seller” if they are so lucky as to be making sales in that time.

And when things suddenly go well… due to some freak internet occurrence, some kind soul with a lot of traffic posting our images, or numerous kind souls posting the same to their friends, Tumbling, Stumbling, Tweeting, whathaveyou, or just the purchase of an original work: When we have shipments out of the way, if we have money left over, what we don’t re-invest in replenishing our art supplies – we use to allow ourselves time for our very best days: A worry free day or week of making more art, maybe sleeping and eating more regularly… maybe even putting ourselves on the list for a convention.

… and for those days of pure art, still working most of the day, we feel like kings; It boggles my mind to see these people who get huge funding and fame for their art, and could actually bear to spend their days just riding out that fame, when they could be using all that money and attention to make bigger and better art… and not just things that will sell or grab headlines simply because a famous person made them.

Truth be told, if art were not so incredibly important to us, we artists could live far, far better begging on the street, or even working a minimum-wage job. We are in a class below “poor”, and often looked at as much less – though we don’t get government money to sit on our butts, no medical coverage, no paid rent, no food stamps, no $5,000 EIC for making babies we can’t afford … Instead, we *choose* not to be a burden on society, we *choose* to overwork ourselves to death, and do so for much much less, and a lot of nothing in between.

We live on caffeine, adrenaline, will power, and most importantly the hope that all of our hard work will someday mesh with the American dream: That determination and sacrifice will pay off in the end.. knowing that having spent years of your life on this pursuit, that giving up now, or tomorrow, would render all that suffering and struggle pointless.

And this is not for lack of skills or knowledge; The both of us are very adept in crazy things like PHP, HTML, CSS, Javascript, Actionscript/Flash, Photoshop, Illustrator, In-Design, and other things that *could* be making us a decent living; We put all that time invested learning into our web sites, magazines, pre-press on our own artworks. We know how to work power tools, we know how to shape and work with lumber, we know how to work with more materials and how to do more things than most people could imagine, because every thing we don’t yet know, reflects something we may one day want to use for art… and we learn it all on our own time, without grants, without scholarships, with no reward greater than simply knowing … and being able to do whatever we cannot pay others to do.

We are thrilled to be able to justify $8 on drive-thru food we don’t have to cook, being able to spend that time instead on art is like Christmas for us… the same goes for trading blown-out boots for the next 2 years’ “new pair” or getting a pair of glasses that are less scratched-up in order to struggle less with the painting. We drive a car the mechanics gave 6 months to live, and have done so for 3 years waiting to have $350 that does not need to go to bills or art. We pay for our medical expenses out of pocket – and just hope for the best on anything we cannot pay for: Abscesses, unknown pains, troublesome coughs, broken bones if they are not compound fractures.

… Really, If I haven’t just cooked up the last breast of chicken and the last egg in order to make sure the cats are fed, or if I am not stressing over catching us up to “$nothing”, it is a pretty good day… yes, I live on the brink of homelessness – and I work very very hard to live on that brink.

For all of our work, despite the amount of homes that have our art hanging in them (including those where the art was paid for), or how many people know us online, or how many places you can find us, or the appearance of our web sites, these hard-working artists are really lucky to make $1 an hour for their 100+ hours a week.

… And I hope I die never knowing what it is to give up on my dreams. If that is sooner, or later – then I hope the the latter as I am not yet where I want to be with my art. Though I don’t think I will ever be satisfied with what I do, I know that choosing comfort or even life over art is death for me.

Any artist who can survive another day, having lived a day as an artist, is a lucky artist

… and I suppose, *yes*, that does make me “successful”.

——————————————————————————

– If you are another artist and maybe looking for some clues on how to survive “the Great Art Depression”, it is pretty simple: The secret to survival is to not give up and die. Those businesses who made it through the 1930’s Depression, came out on top, and remained there for the rest of the century.

——————————————————————————

– If you are not an artist, and I have provided some level of understanding, or if you simply agree – Please take the time to add to the success of the creatives you appreciate seeing work from. Buy a CD, buy a book, or an e-book, watch a program and wait through the commercials… And though some of the art you enjoy may be a bit dark or crazy for your walls, do something more than just setting a desktop image. Maybe this means giving them $1 – not as a handout – but in appreciation for the millions of hours of thankless work and study  they invested into just getting to the point where you can enjoy an image – or maybe this means telling a few others about their work.. stumble, tumble, blog, do *something*… become a part of the creative process, a part of history, by tipping the scales in favor of what you like to see, hear, or read.

Posted on 11 Comments

Custom Framing on an Artist’s Budget

One of the more painful and costly steps along the way to an art show or convention for us, and other artists we know, is most always framing.

It seems that artists and artisans anymore, can be some of the most heavily exploited tradesmen when it comes to tools and supplies …and frames are certainly no exception.

Art supplies tend to be priced for Warhol-famed artists, design agencies with multi-million dollar clients, or students who simply have to have these things, and will have to take out loans and grants accordingly; Frames are often priced for artists of Ryden renown, or remarkably wealthy art buyers – factor in huge percentages for art sales through galeries, and it is no wonder that the gallery owner lifestyle of nice cars and sipping champagne contrast so beautifully with those of the artists supported: which I suppose for most of us… well, I don’t know how you get by, but lets say “robbing liquor stores for brush money” as a rather broad example.

And since for any show or convention it is good – if not mandatory, to have hang-able art. Many of us artists need to get creative if we wish to account for a 40% cut on sale price, and frames, without demanding a “Just who does he think he is?” sort of price.

One route, of course, is to gallery-wrap, or museum wrap paintings and giclees in a way that makes for a nice display without the need of a frame. Add a touch of color or a reflected image to the overlap, and such things do really tend to look very nice… though modern by default. Gallery wrapping and museum wrapping is available as an option for ready canvas through most any art supply provider, and having giclees stretched these ways is an option with most decent giclee printer. Doing this one one’s own is moderately difficult for gallery wrap, and strenuous for museum wrap – but by no means impossible.

If however your works are already stretched and mounted, with staples down the sides, or if they are painted/drawn/engraved on boards or paper and absolutely need to be framed – there are still a few creative, inexpensive, and simple ways to go.

One of which – if your works will fit standard frame sizes, is to go on “50% off!” weeks (we like to call them “regular price weeks”) to Hobby Lobby or Michael’s and buy their pre-made frames. Another solution of course is to go to places such as Target and Walmart and browse, looking for discounted frames that can be redecorated and customized to look nice… perhaps even to become works of art in their own.

One problem I have found with many of the ready-made frames (and even many custom frames), something I particularly dislike, is that I find many of these frames are either plastic, or low-grade wood, either made to look like better wood by way of plastic/acrylic veneers or overlay, ornate clay designs painted or coated over, or by other means. The most standard being those which are low-grade wood with the clay and paint overlay, which tends to chip and break in shipping… if it isn’t already broken in this way at time of purchase. The ones at non-art stores tend to be plastic molding with a plastic wood-grain sheet ironed onto them… again… trying to avoid that.

So, yesterday, after browsing many ready made frames at all the aforementioned stores, not finding anything I liked at a reasonable price – and finding mostly overpriced junk, I decided to try to make my own.

The first step was a trip to the hardware store for lumber, where I purchased four 6’x4″x1″ pieces of wood.. having struck out on all avenues in looking for a source for the wood strips framing galleries use. I’ll have to try that some other day.

So… wood…

I’d like to say I went for the fine cherry, a nice fire maple, or something moderately exotic – but what I ended up going for was a compromise.

At Home Depot, I found their “exotic wood” be be very exotically priced. I am used to prices being high on hardware at woodcraft – but Woodcraft’s prices certainly beat (by light years) the wood prices at Home Depot. I will have to remember: Woodcraft for wood, Home Depot for hardware.. but, of course it was late at night when we went… So Home Depot was pretty much where we were going for the lumber.

Pine being cheap and sub-quality wood, I looked to avoid that route – but in the good wood section I found what is called “select pine” – which is not quite gold-grade heartwood pine, but certainly not shabby construction-grade pine. It is nice and heavy, very dense actually, with a really fine grain and very tiny knots. I was rather surprised by how sturdy and dense it was, and at $4.19 a  6 foot piece – I decided to give it a try (and having tried it, I am actually quite happy with it).

[Edit] Having returned, and taking a closer look at Home Depot’s stock, I also found some really nice Maple there for about $1.40 a linear foot – still more expensive than the pine, about twice the price but certainly not bad. I also found cherry and red oak shelf capping for around $1 a foot, which I plan to use in future projects in place of the moulding below.

moulding
Molding

I also grabbed some decorative wood strips from Home Depot (sort of like above, but not the same design)… rounded and decorative on one side, flat on another. My plan is to use these to make the frames a touch more ornate. The price wasn’t bad.. $2.16.. Oh? Not “per piece” .. that’s a linear foot? Okay… I bought one six foot section. Also in my arsenal is some brass chain at Hobby Lobby (clearance priced)… about 120 inches of it. Home Depot had wood appliques – but their prices on those were ridiculous – I am supposing they were trying to get as much as possible out of cabinet makers. The things are incredibly cheap by comparison at Michaels… I’ll have to go there tomorrow, as they didn’t have them at Hobby Lobby and I wasn’t about to pay the Home Depot price for them.

Wood Applique
Wood Applique

So… first step: Cutting the wood

So… first step… measuring the wood.

These artworks are 5×7 inches. So, I want the inside of my frame to be about 1/8 of in inch smaller than that. Typically I’ll sit there and figure up the best mathematical formulae to get the perfect result – but diving right in, I simply measured 1/8 of an inch in, and used my 45-degree plastic triangle to mark where the first 45 degree cut would intersect that drawn line. I measured 6 + 3/4 (7 inches minus two times 1/8 of an inch) of an inch along that line, marked that point, and used the triangle to draw a line where the next cut would go.

From there I carefully and precisely made the first cut on the table saw, using my 45-degree angle-guide. Then I carefully and precisely made my second cut. From there it was just a matter of sliding forward my 45-degree guide, placing one edge against the (stopped) table saw blade, and lining up the straight guide to the end of that piece. After this I could just cut, flip the wood over, cut, and flip the wood over, making perfectly identical trapezoidal wooden pieces… my 7-inch sides.

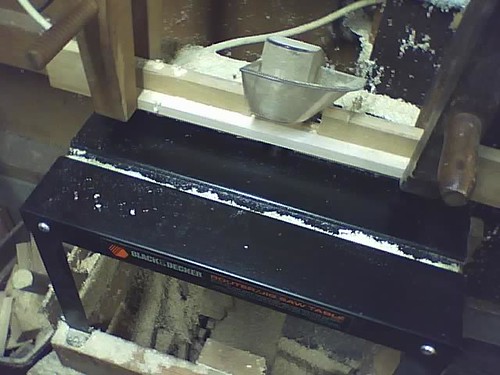
Table Saw: The same 45 degree jig and same position as the very first cut. The difference is the piece is flipped and moved to the guide in order to reflect the opposite angle, and the achieve the right length. This can also be done with a miter box, but the table saw really makes it go much faster.
Table Saw Guide - My clamp keeps the wood from popping/leaning up, or sliding along the guide.

After cutting the first two, just in case my angle guide was not entirely accurate, I matched up corners on the cut pieces, and checked them with my triangle, to make sure they were squaring up. They weren’t. So I made an adjustment of half a degree – and used these pieces over and over again until the angle was perfect.

One of the cut pieces. Remember - Trapezoid, not parallelogram. No adjustments need to be made to the guide for this, just flip the wood. Also note my sleeves... not recommended for anyone without a death wish. Loose sleeves, long sleeves, are not the best attire for workshops.

I made 18 of these long sides, saving the first two ‘test pieces’ for use in making the shorter sides, since they were shorter after all the test angling.

Then I made the 5-inch sides, in the same manner as above, until I 18 of those as well.

After this, I needed to make it so that the artwork could rest inside the frame, meaning that 1/8 inch recess (rabbet) planned for needed to be carved into the inside dimensions along the back of the frame-to-be. This is a good time to have a router (and a router table is all the better).

*If you do not have a router, which I am sure a lot of you may not, I would recommend starting with decorative beading (the sort of trim that, in a house, runs along a floor or a ceiling… available at most lumber stores). From there you can just build a simple square and square-edged frame for your work, with the inside of this being the exact size of your artwork (n0 need for a rabbet), but use the measuring and cutting steps above on the trim. The trim can be assembled on top of the box frame, glued, pressed, and clamped for a very nice look and sturdy frame. Those are the basics… I’ll go over that particular method in more detail, but it will have to wait for another post*

Router and Router table - I set up two guides for this one. One to set how far back towards the bit the wood piece can go, one to keep it down to the table (while at the same time to keep my fingers away from the bit)

I used a router bit which has a curved into flat bevel, called an “ogee”. The flat edges would hold the artwork well, and the rounded surface would allow for the least amount of surface contact on the art side of the artwork.

common router bits and their profiles
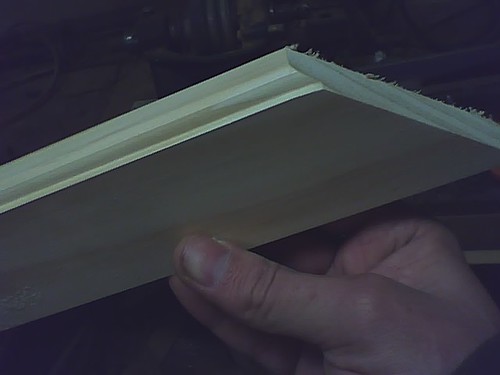
Routed edge - better than a rabeted edge, because the curve keeps more of the arts surface away from the frame itself, which prevents a rubbing on the art surface.
Routed edge - better than a rabeted edge, because the curve keeps more of the art's surface away from the frame itself, which prevents a rubbing on the art surface.

I also used this same decorative “Ogee” bevel on the inside front as well. As a bonus, being the same on the inside dimension front to back, I could choose which side looked the best (according to the smoothness of the cut, the look of the grain, dents and dings, etc.) .

Having chosen which side would face front, I then took to beveling the Outer Edge on front side, giving it a smoothed and decorative face on the front (inside dimension and outside), but leaving the back flat and flush. For several of my frames, I also made the back outer edge beveled as well, giving the frames a nice rounded edge.

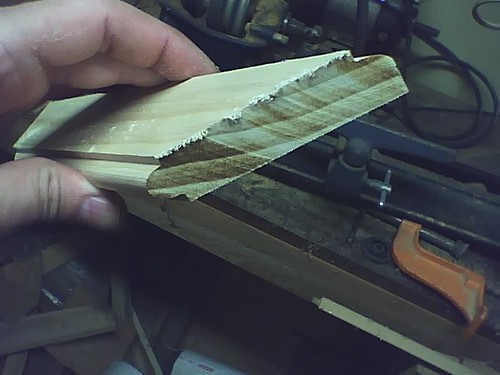
Three routed edges - two on the inside near the artwork, one on the front and outside of the frame. The fourth edge is left plain so it can be flush with the wall.
Three routed edges - two on the inside near the artwork (against my thumb), one on the front and outside of the frame. The fourth edge is left plain so it can be flush with the wall.

Once I had all my pieces done, I quickly sanded off all frayed edges and burs from my cuts, so the frayed ends would not get in the way of the next step: gluing.

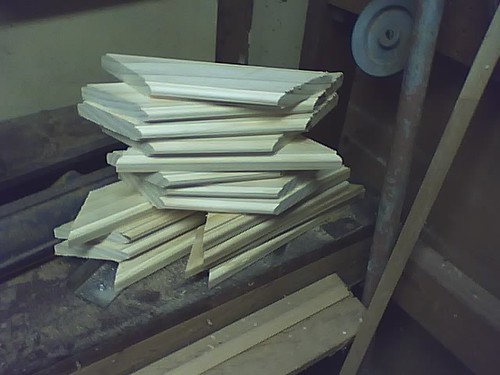
A stack of frame pieces, ready to debur, glue, and press.

Glue, actually holds more securely than nails or screws, if done properly, and of course keeps unsightly nails and screws from your frames. Such also negates the risk of splitting your pieces with such fasteners during the construction process.. which would be a terrible waste of all the work done up to now. There are special fasteners for framing (to be used later), but the glue is most important.. and will make that fastener step much easier if you choose to use fasteners.

I used a four-point box clamp for this. It makes jobs like framing, assembling stretcher bars for canvases, making boxes/cabinets, all go much more smoothly with these sort of clamps. If you don’t have them, I’d recommend using two (preferable four) bar clamps or pole clamps for this step.

4-way clamp around the frame, glue at each edge. The pressure pushed glue deep into the end grain, giving the frames a very strong and sturdy bond.

Put glue along the ends of each piece, in thin streams, but try to cover most of the ends, and try as best you can to get the very edges of each end. Clamp them together, make sure all pieces line up square and even. Un-clamp and re-clamp if necessary… Such is much better than letting it dry uneven and having to redo this step or sand things down.

Let the frame sit this way for at least a half hour (preferably longer) before moving it. If it has only been sitting a half hour, remove move it carefully and then leave it be. You will however get better results if you leave each frame clamped for an hour or more. I plan to use 3/8 corrugated fasteners on each corner – they aren’t completely necessary, but they give a bit of added peace of mind to neurotic people such as me.

corrugated fastener
corrugated fastener
Not-so-finished product. Staining and other decoration yet to be done, as well as the addition of the hanging hardware. The artwork is not secure yet btw; It is just there for the photo.

Next steps – added (wood) decoration, staining, added decoration (metal), placing the artwork, hardware (for hanging).

(Next installment)